
A closer look at our work
A tile roof for the community’s poolside gazebo
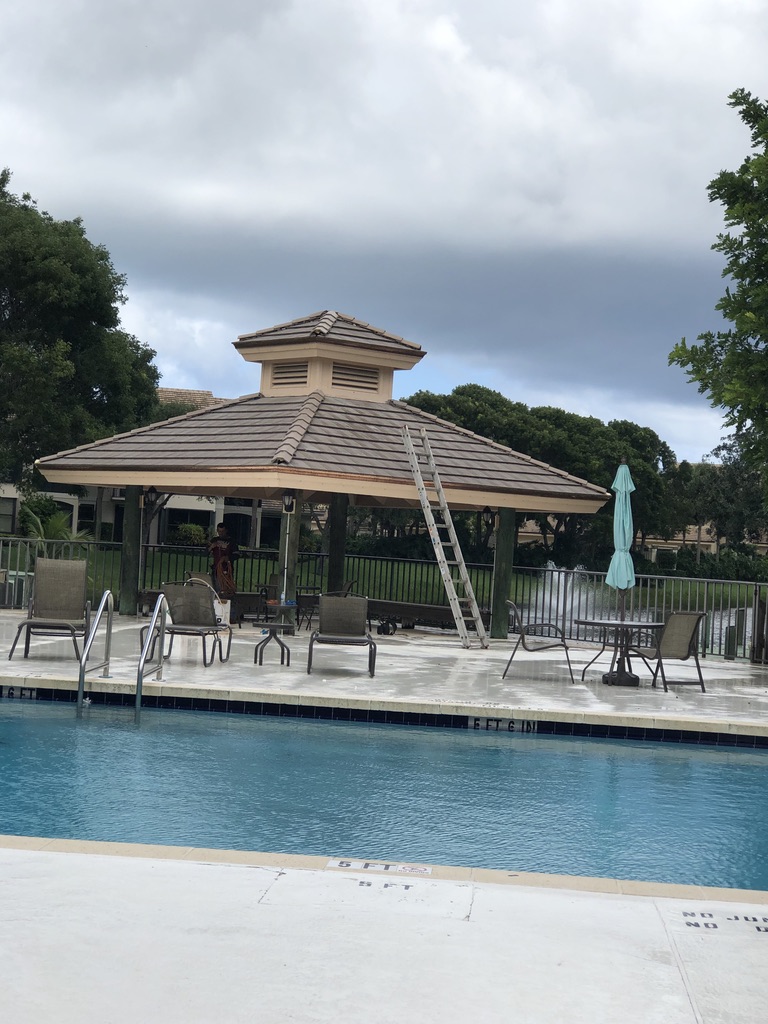
The gazebo sits beside the pool, with an open seating area below and a smaller raised roof above. Our work was limited to the gazebo roof. Explore our roofing services in Miramar for other local roofing needs.
- Location
- Miramar, Florida
- Property
- Apartment community
- Our scope
- Gazebo roof only
- Roof tile
- Saxony 900
- Underlayment
- Seam tape + #30 felt + TU MAX
- Tile attachment
- ICP foam adhesive

Saxony 900 tile
The flat concrete tile selected for this gazebo. Exact color name unconfirmed.

Polyglass · Polystick TU MAX
The underlayment installed above the 30-pound felt.

ICP foam adhesive
The tile adhesive identified by M&M for this installation.
From across the pool, the straight tile courses and matching caps define the roof’s shape. Up close, the photos show the underlayment, adhesive, and metal support that become less visible as the roof comes together.
Get My Free Tile Roof EstimateBeneath the tile
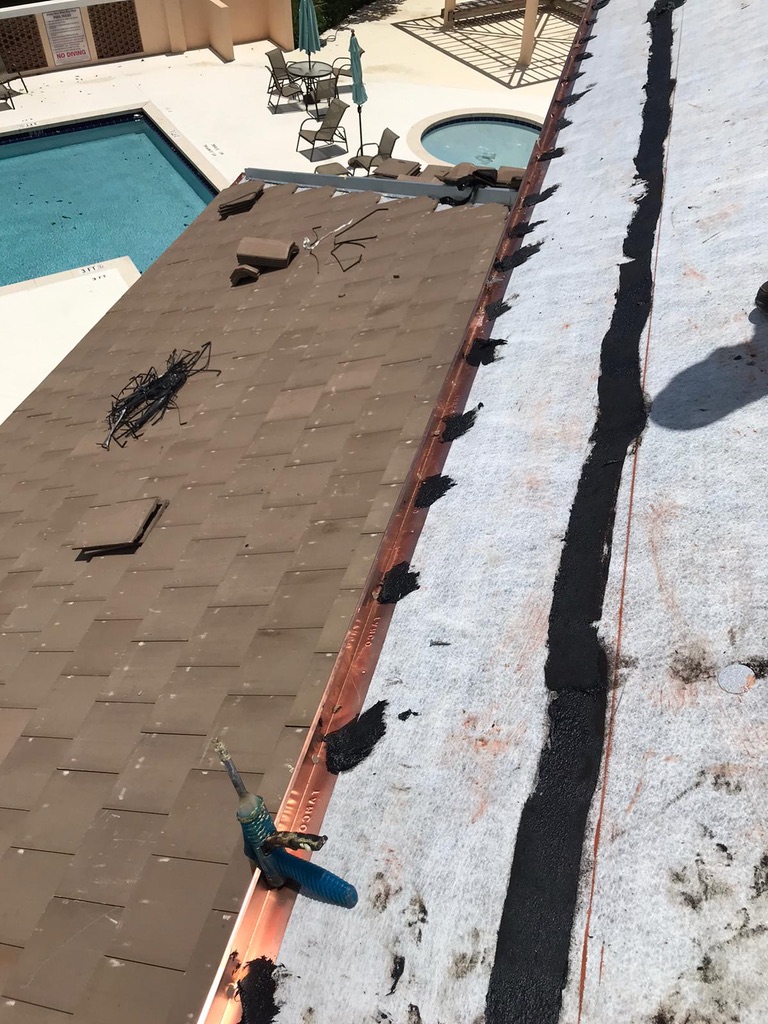
Seam tape, 30-pound felt, then TU MAX
For this gazebo, we installed seam tape, followed by 30-pound felt and Polyglass Polystick TU MAX. That sequence matters: the TU MAX went over the felt in this project.
- Seam tape at the roof-deck joints.
- 30-pound felt over the deck.
- Polystick TU MAX above the felt.
- ICP foam and Saxony 900 tile above the underlayment.
The installation photos let you see the surface beneath the tile before the next course covers it. Our Polystick TU MAX underlayment guide explains the product and shows how it fits into other M&M roofing projects.
Tile attachment
ICP foam beneath the Saxony 900 tiles
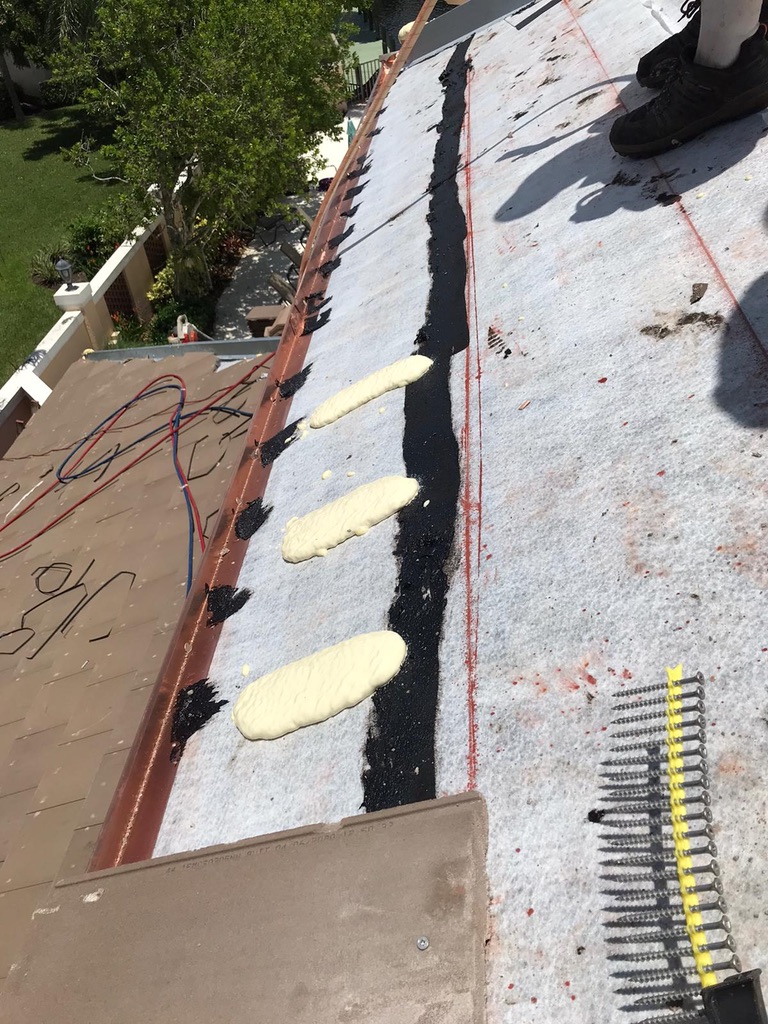
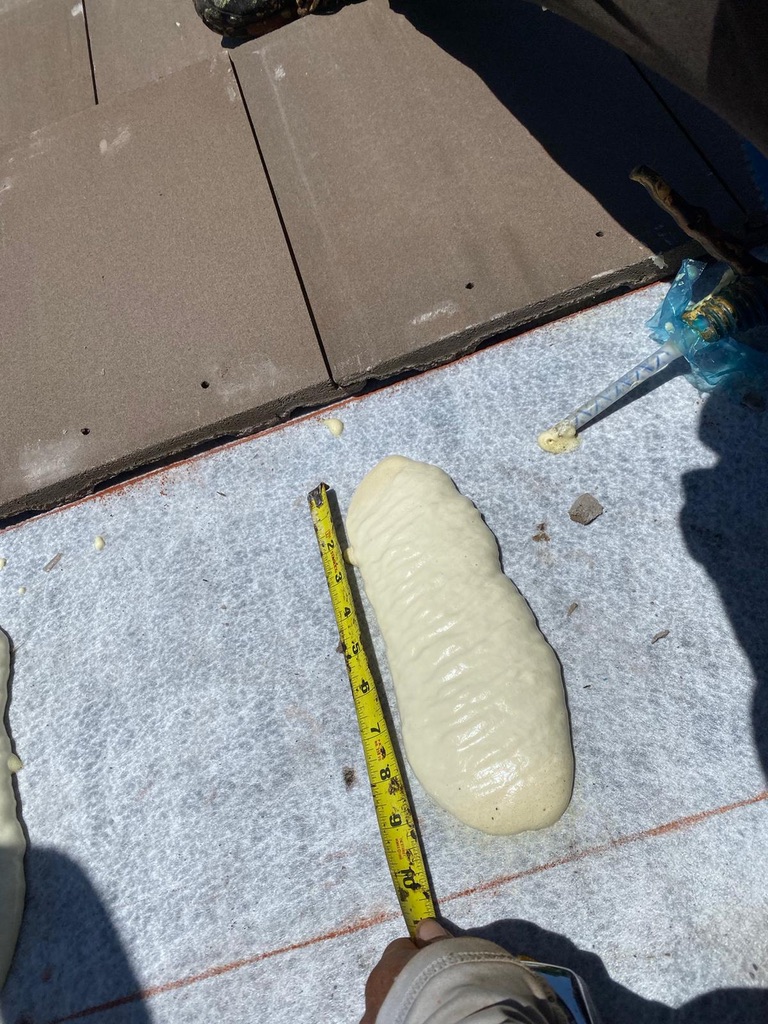
We used ICP foam to set the field tiles, with the application described in our project notes as a 2-inch by 7-inch paddy. A “paddy” is the individual portion of adhesive placed beneath a tile.
The photographs document foam placement along the next tile course and close-ups with a tape measure. The 2-by-7-inch description records this job’s application; it is not a general sizing instruction for other roofs.
For more background on attachment options, our APOC Polyset AH-160 foam-versus-screws comparison explains why the adhesive, tile, and attachment configuration need to be considered together. That guide covers AH-160; the exact ICP product used on this gazebo has not been confirmed.
Discuss My Gazebo RoofThe finishing detail
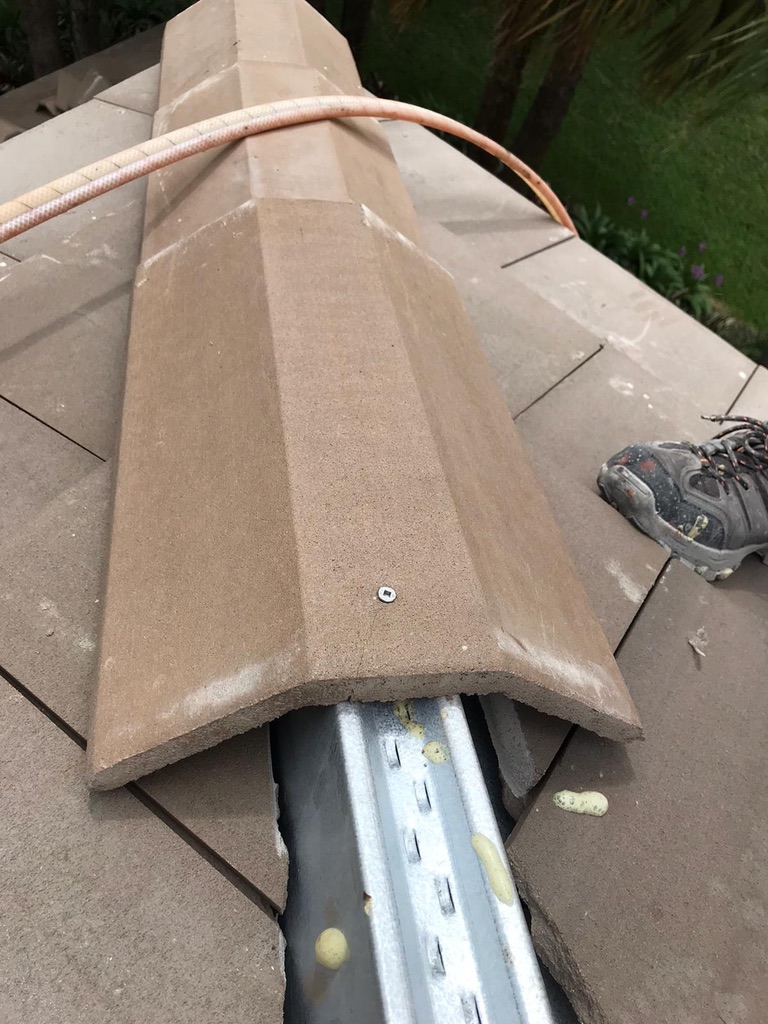
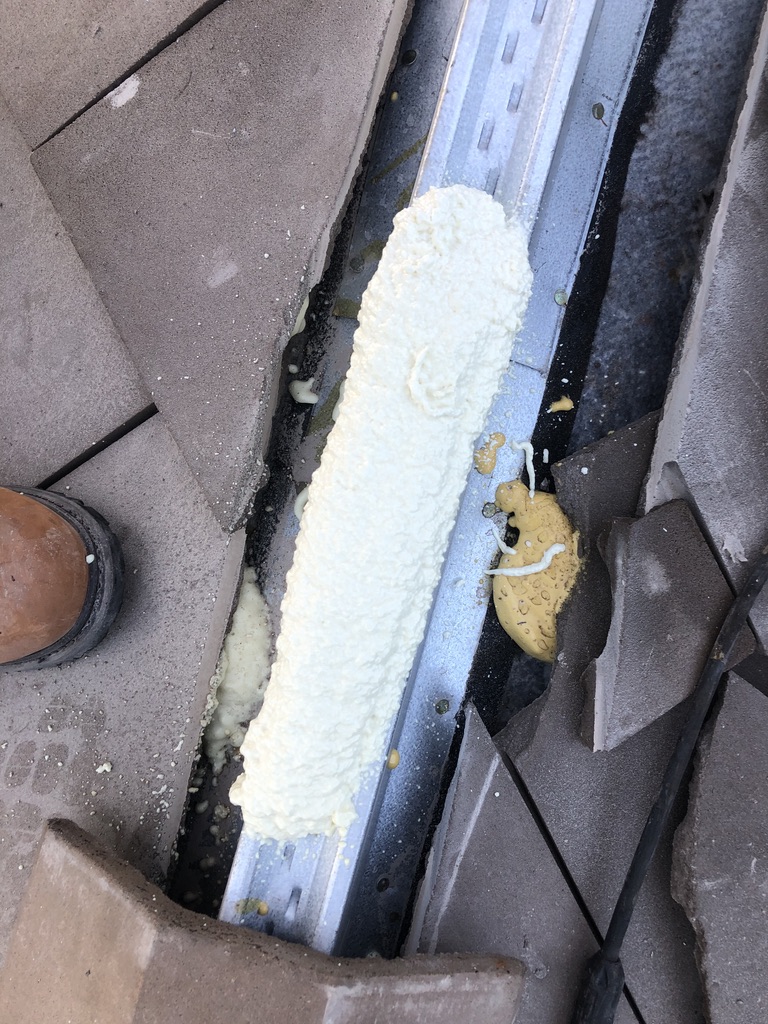
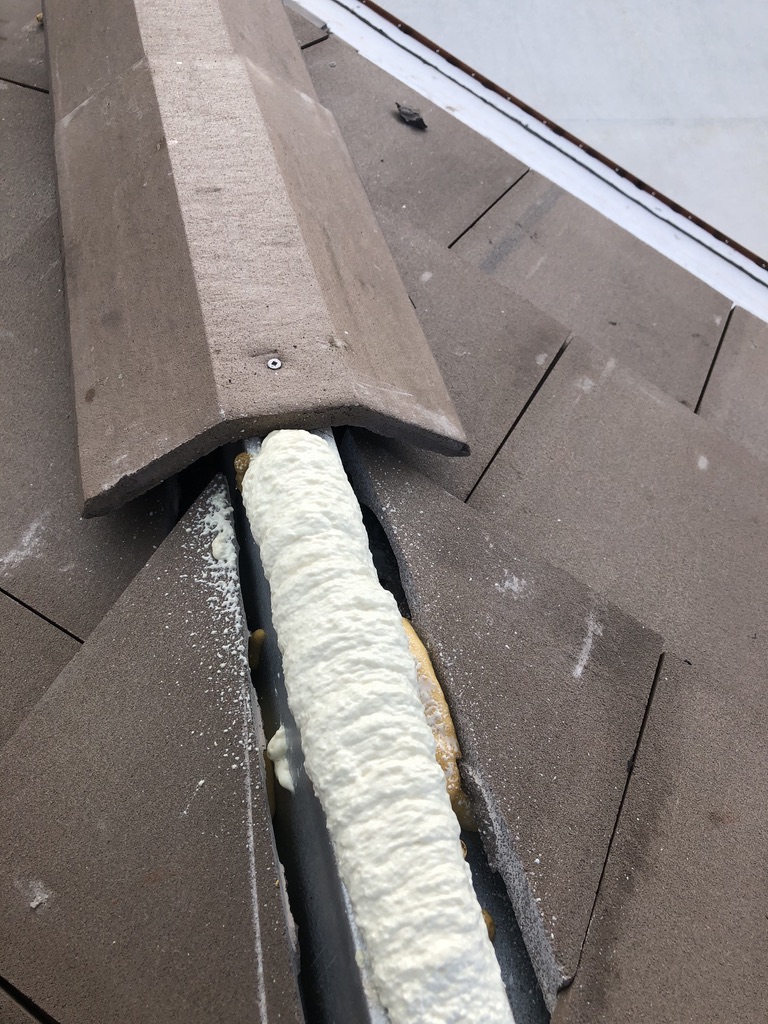
Hip and ridge caps over metal support
The cap-installation photos show the part you described: metal support beneath the concrete caps, adhesive on that support, and caps being placed over it. The raised diagonal lines on this hipped gazebo roof are its hips; the cap pieces are often discussed together as hip and ridge caps.
Once installed, those overlapping caps finish the junction between adjoining tile slopes. Showing the work before the caps cover it gives property owners a closer look at the roof’s assembly.
The finished appearance
A flat tile profile that follows the gazebo’s shape
Saxony 900 gives this roof straight horizontal courses, with cap tiles tracing the hips toward the raised center. The tile reads as a warm neutral in these photographs; the manufacturer’s exact color name is not confirmed.
Our Saxony 900 Slate guide offers a closer look at the flat profile and color choices. Use it for planning, rather than identifying this roof’s color from a screen.
For an overview of the work involved in a complete tile assembly, explore our concrete and clay tile roofing services.
Get My Free Tile Roof Estimate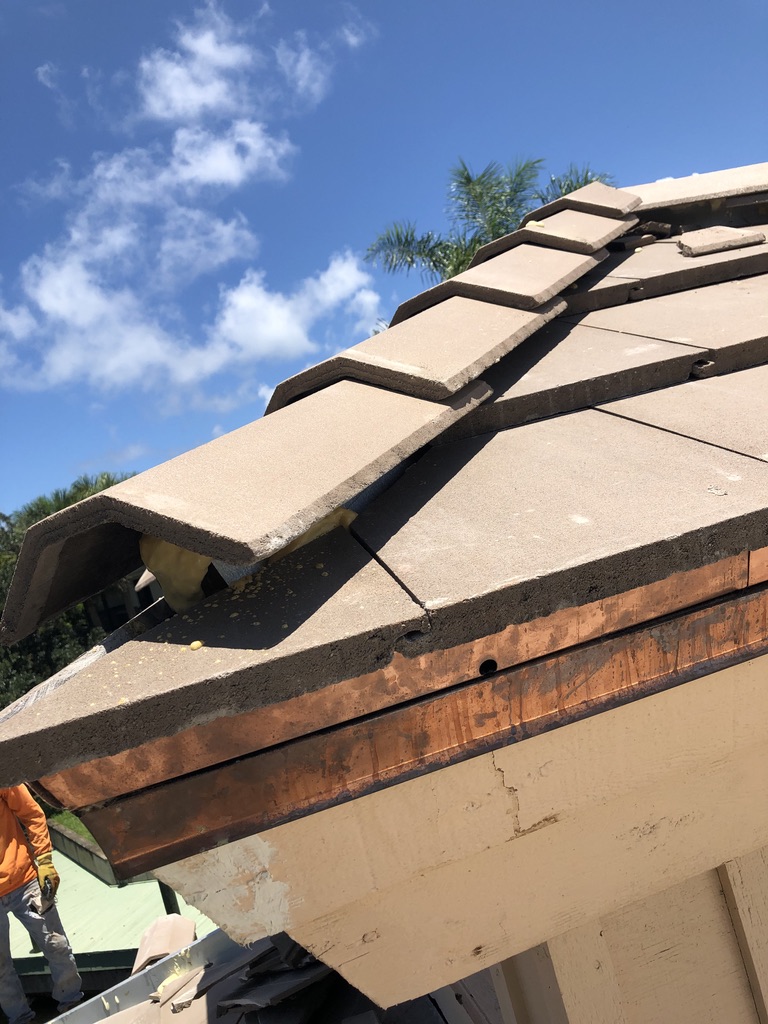
More installation photos
Closer views of the foam application
View three additional measurement photos
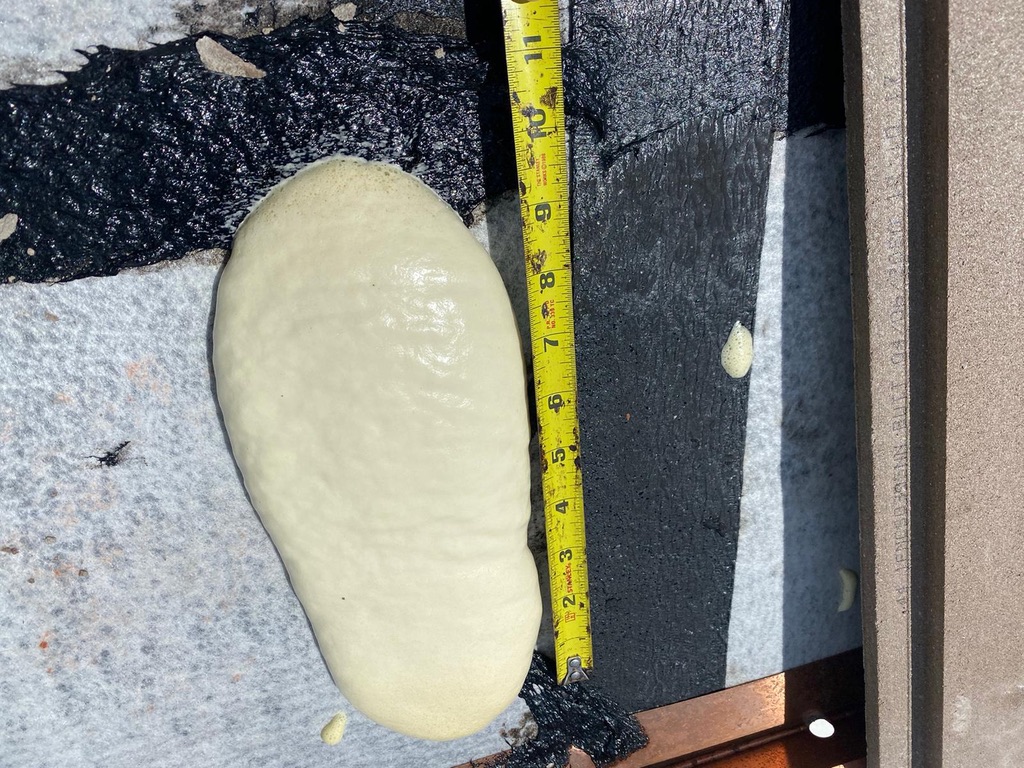
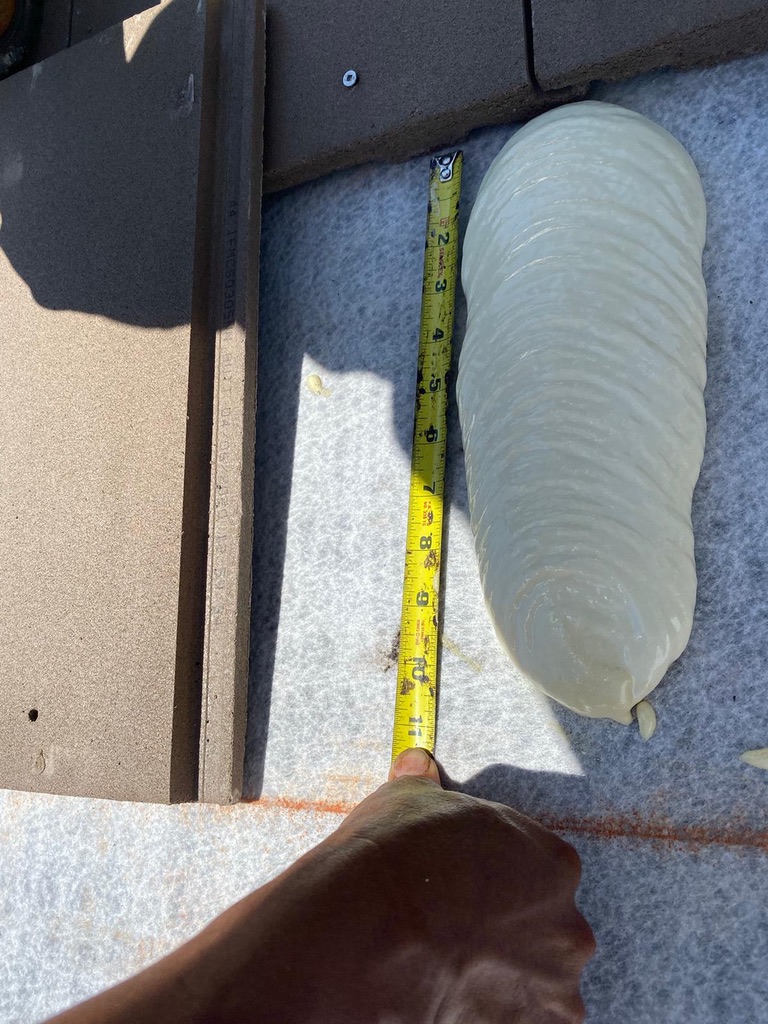
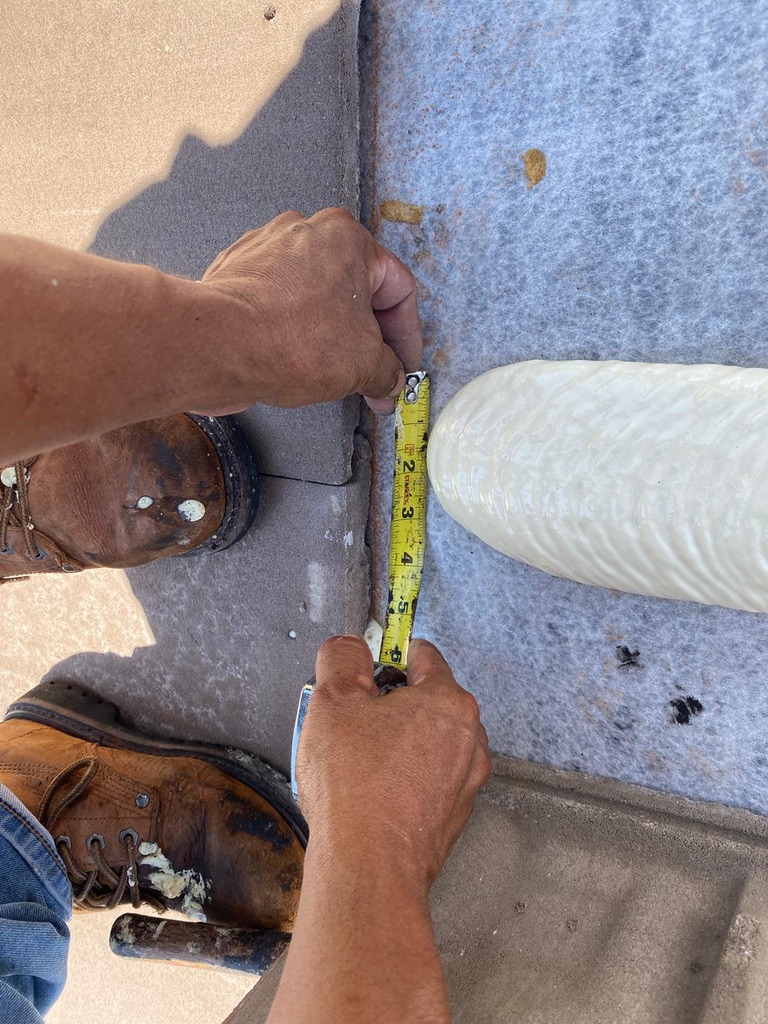
For another local example, see our Windsor Slate tile roof replacement in Miramar. That separate residential project used a different tile and a direct-to-deck underlayment assembly.
Project FAQs
Questions about the Miramar gazebo roof
Did M&M roof the entire apartment complex?
No. Our scope was the poolside gazebo roof only.
What tile did you install?
Saxony 900 concrete tile. The exact manufacturer color name has not been confirmed.
What went underneath the tile?
We installed seam tape, 30-pound felt, and Polyglass Polystick TU MAX, followed by ICP foam and the tile.
How were the tiles attached?
We used ICP foam adhesive. M&M’s project account describes a 2-inch by 7-inch paddy; that description is specific to this job.
Were the caps installed over metal?
Yes. The close-up photos show metal support beneath the hip/ridge caps, adhesive on the support, and caps positioned over it.
Where in Miramar was this gazebo?
It was at an apartment community in Miramar. The community name and street address have not been confirmed.
Let’s talk about your tile roof
Share the property location and the scope you have in mind for your home or community structure.