
In-Progress Project Overview
What Happens Before Tile Goes Back on the Roof
On Southwest 132nd Way, Miramar, FL 33027, M&M Roofing and Construction Corp. is documenting a tile-to-tile reroof during its dry-in stage. The property is in Somerset Country Club, a community within Vizcaya. This update covers the exposed-deck inspection, replacement of deteriorated plywood and fascia where encountered, deck re-fastening, edge-metal preparation, and installation of Polyglass Polystick® TU MAX self-adhered tile underlayment. The tile covering has not yet been installed, and the dry-in inspection result is pending.
Project status: In progress
Dry-in inspection pending. This is not a finished-roof or inspection-approval announcement.
- Project status
- In progress — dry-in inspection pending
- Public location
- Southwest 132nd Way, Miramar, FL 33027
- Community
- Somerset Country Club, a community within Vizcaya
- Project type
- Tile-to-tile residential reroof
- Dry-in system
- Polyglass Polystick® TU MAX, direct to prepared deck
- Work documented
- Plywood, fascia, deck fastening, edge metal, and underlayment
The community name is provided for local context only. No HOA approval, endorsement, inspection, or responsibility is claimed.
Purpose of This Progress Update
Showing the Work That Will Be Covered by Tile
A completed tile roof does not show the plywood repairs, fascia work, perimeter preparation, or underlayment beneath it. This case study records those intermediate steps while they remain visible.
The photographs support a focused account of the dry-in stage. They do not establish a finished tile profile, color, attachment method, warranty, inspection result, or other later project milestone.
Next Milestone
Prepared for the Dry-In Inspection
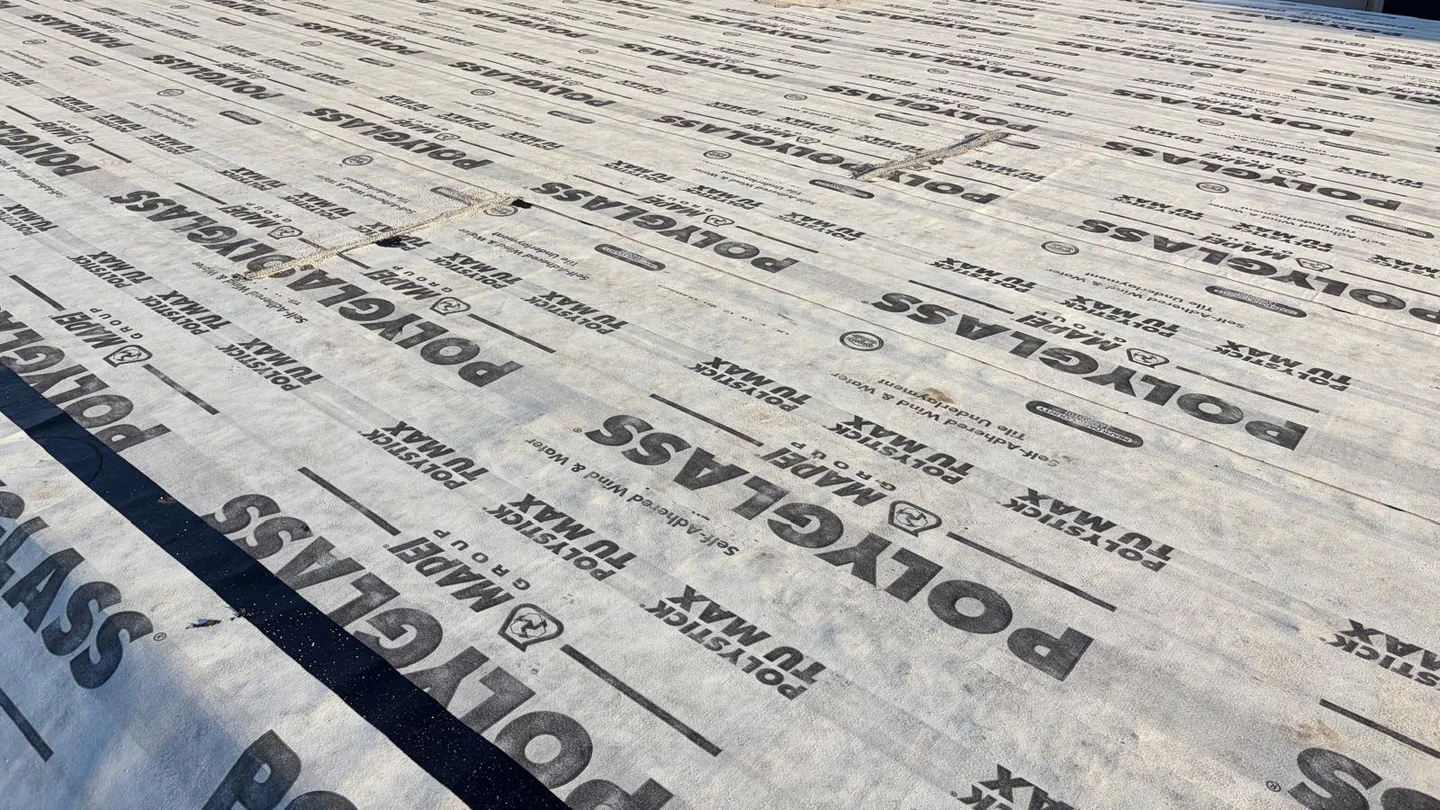
At the photographed stage, the repaired roof deck was covered by the self-adhered tile underlayment and the project was preparing for its dry-in inspection.
Inspection acceptance is determined by the building inspector or authority having jurisdiction. Until that result and later work are documented, this page remains explicitly in progress.
Documented Work Sequence
From Tile Tear-Off to a Pending Dry-In Inspection
These stages follow the documented project order. Specifications and conditions that were not supplied are deliberately omitted.
- 01
Existing Tile Removed
The existing tile roof covering was removed so the wood deck and roof edges could be examined. The photographs begin after tear-off and do not identify the age, profile, or failure cause of the previous tile.
- 02
Deck and Fascia Inspected
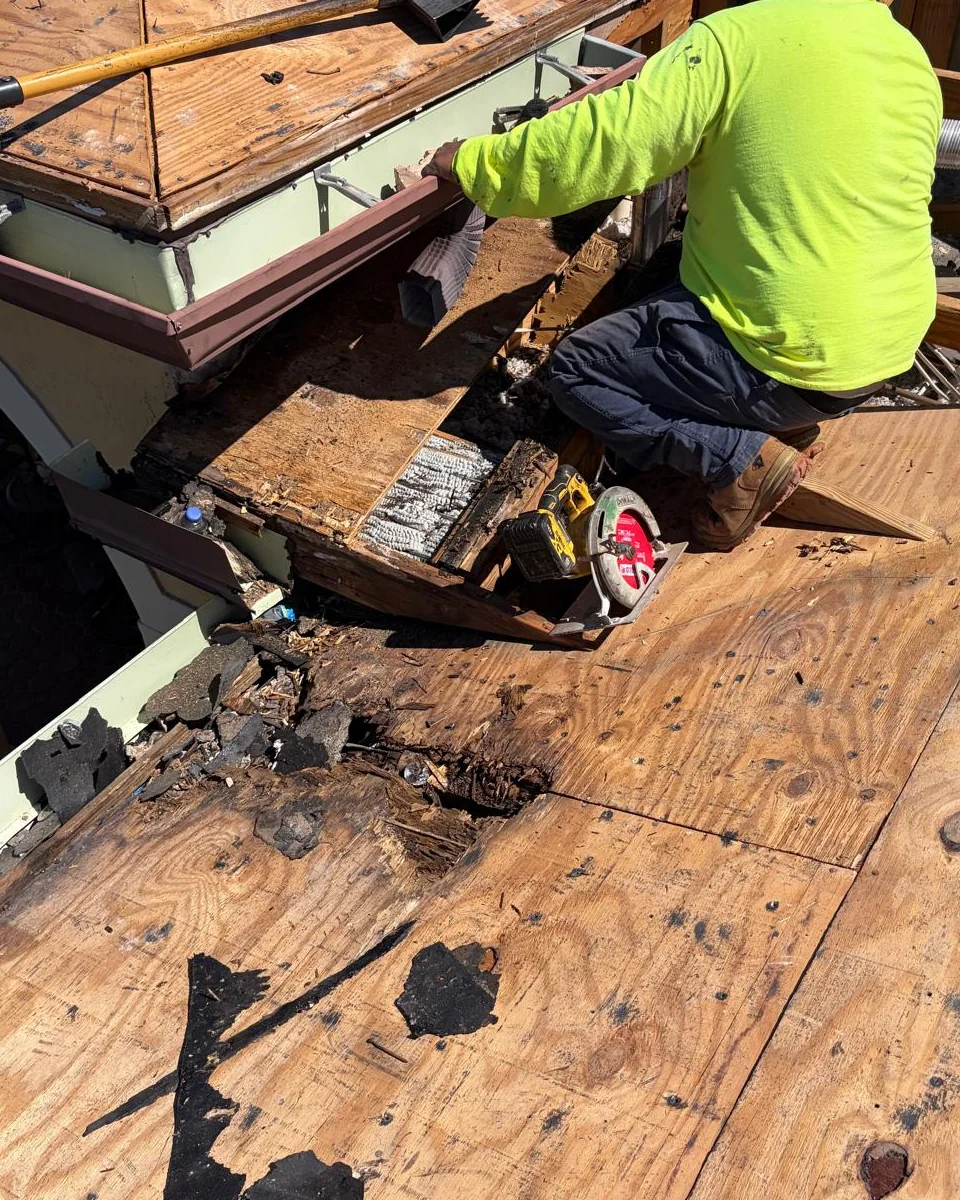
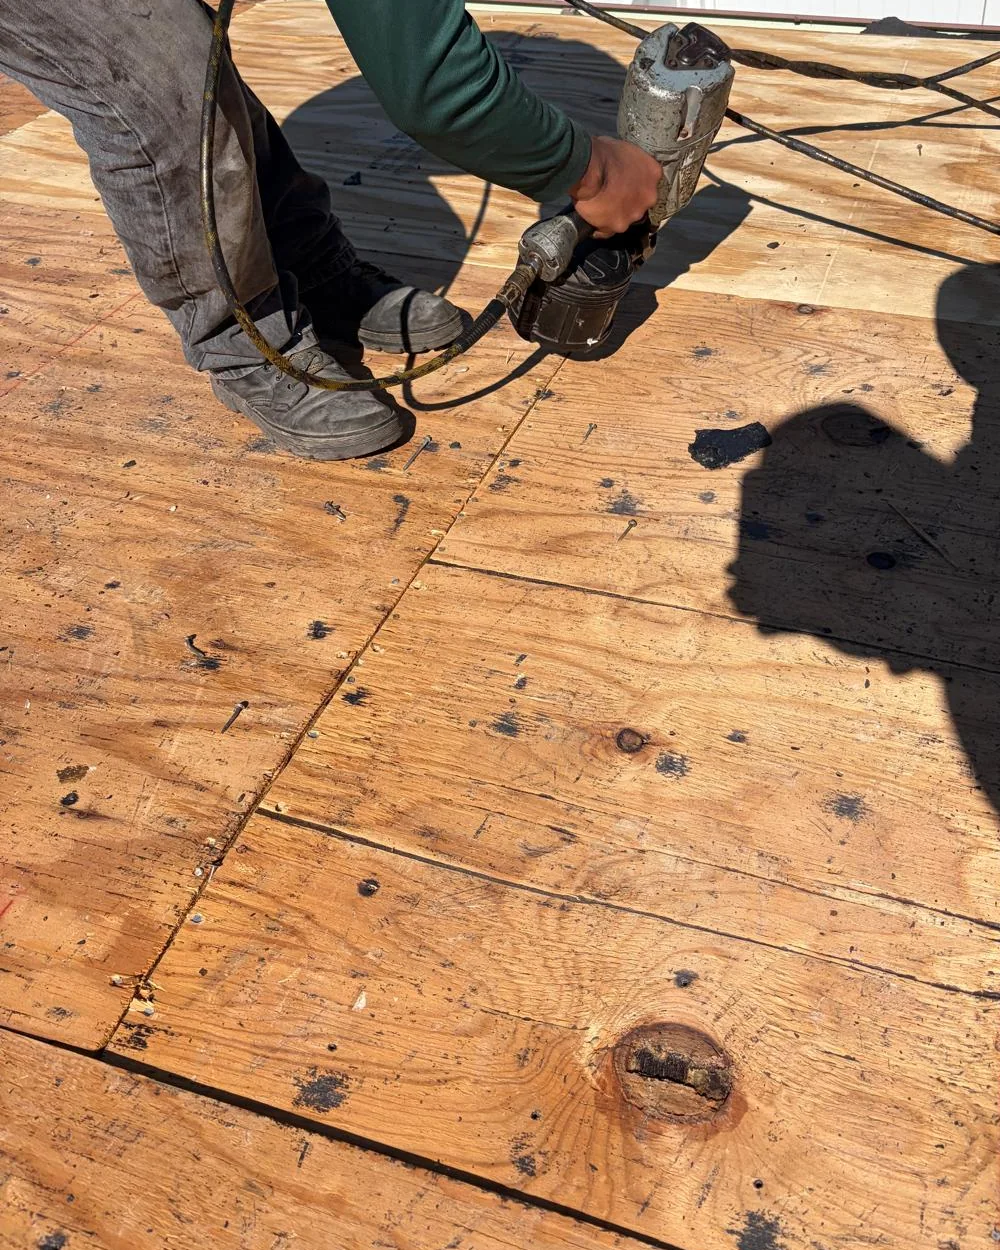
With the roof covering removed, deteriorated plywood and rotted fascia were exposed at localized areas. The page documents only the conditions visible in the supplied project photographs.
- 03
Deteriorated Wood Replaced
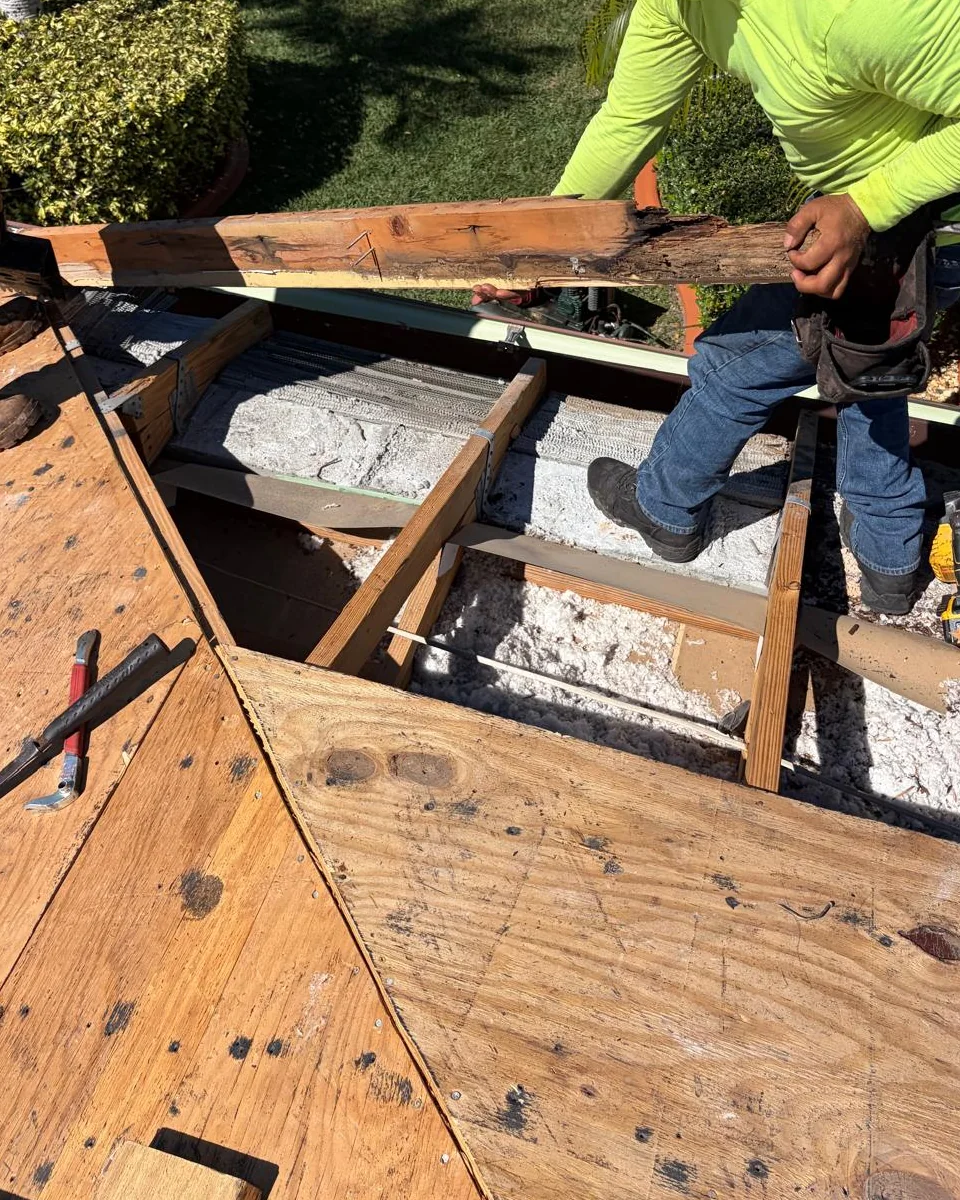
Damaged plywood sections and rotted fascia were removed and replaced before the dry-in continued. No total sheet count, board quantity, lumber grade, or hidden-condition claim is stated.
- 04
Roof Deck Re-Fastened
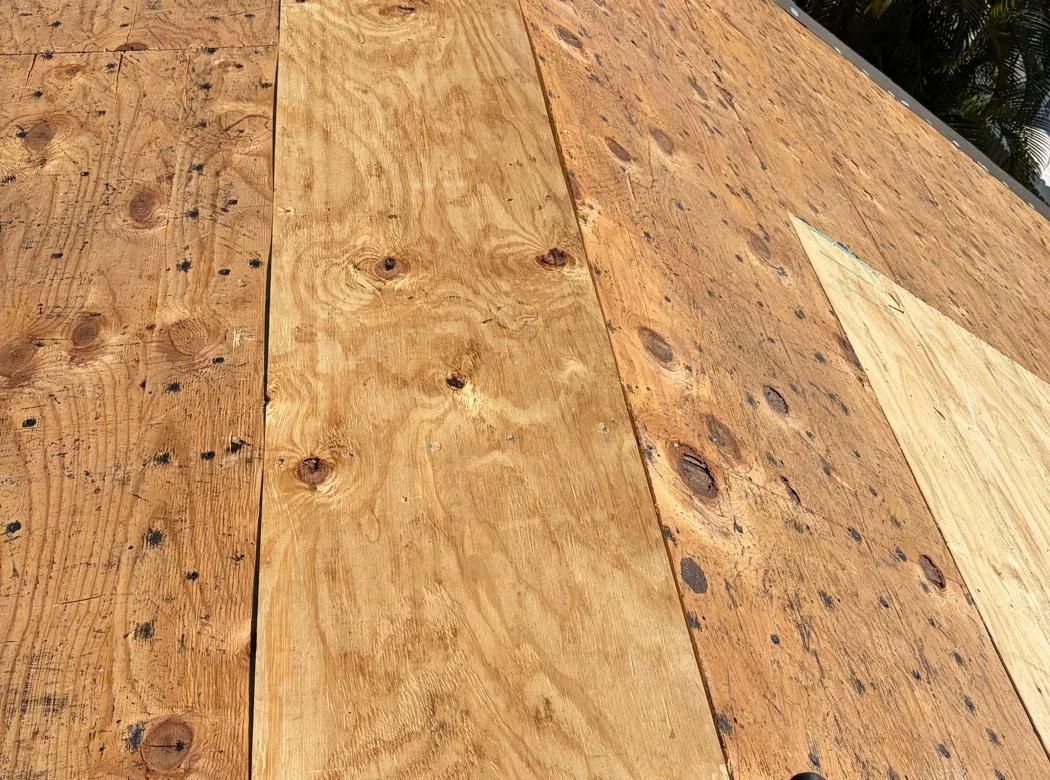
The crew re-fastened the plywood deck as part of the permitted dry-in preparation. The photographs do not establish a complete fastening schedule, and the building inspector or authority having jurisdiction determines acceptance.
- 05
Drip Edge Installed
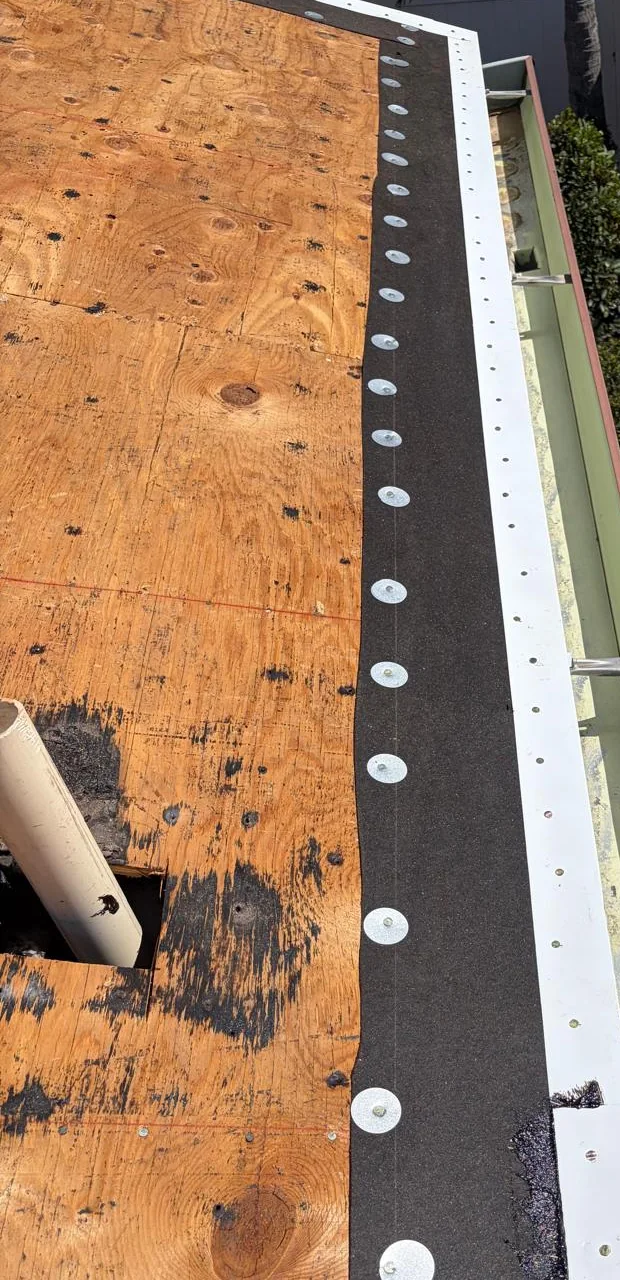
Metal drip edge was fitted along the repaired roof perimeter. This in-progress record does not infer metal gauge, fastening spacing, coating, or another unprovided specification.
- 06
Edge Metal Prepared
Primer was used to prepare the drip-edge surface before the self-adhered dry-in membrane was completed at the perimeter. No primer brand or project-specific cure time was supplied for publication.
- 07
TU MAX Applied Direct to Deck
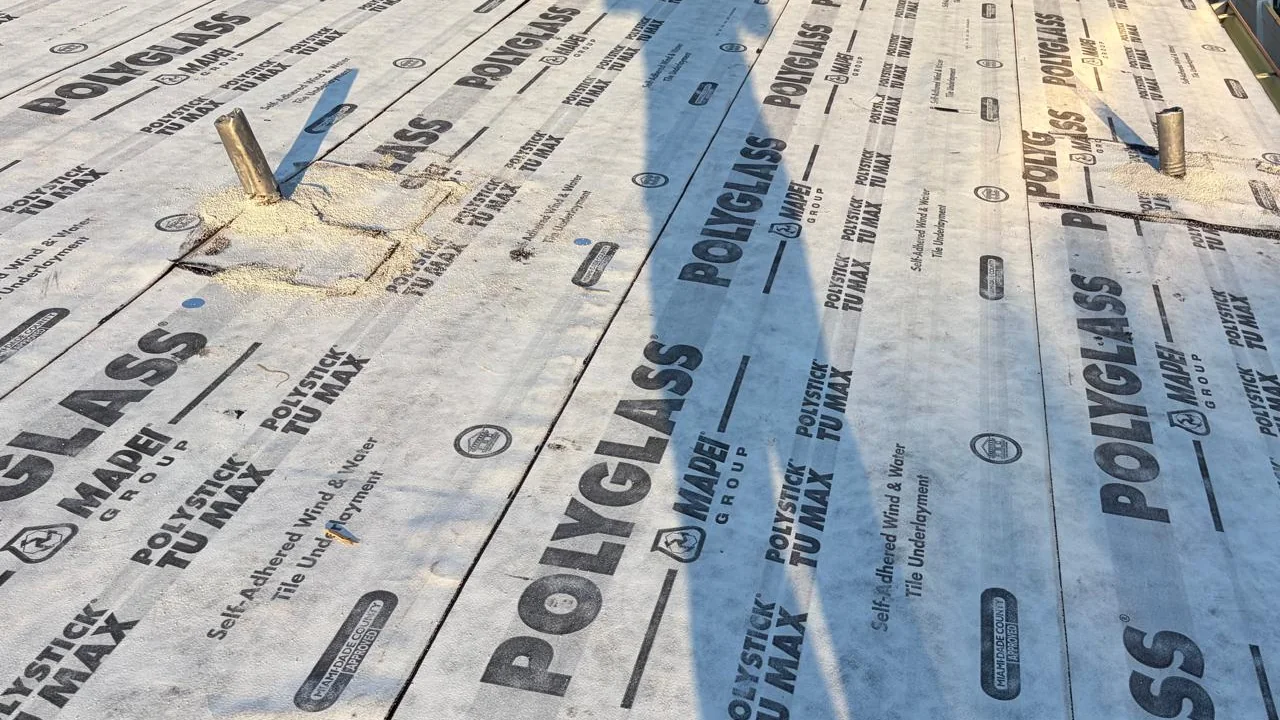
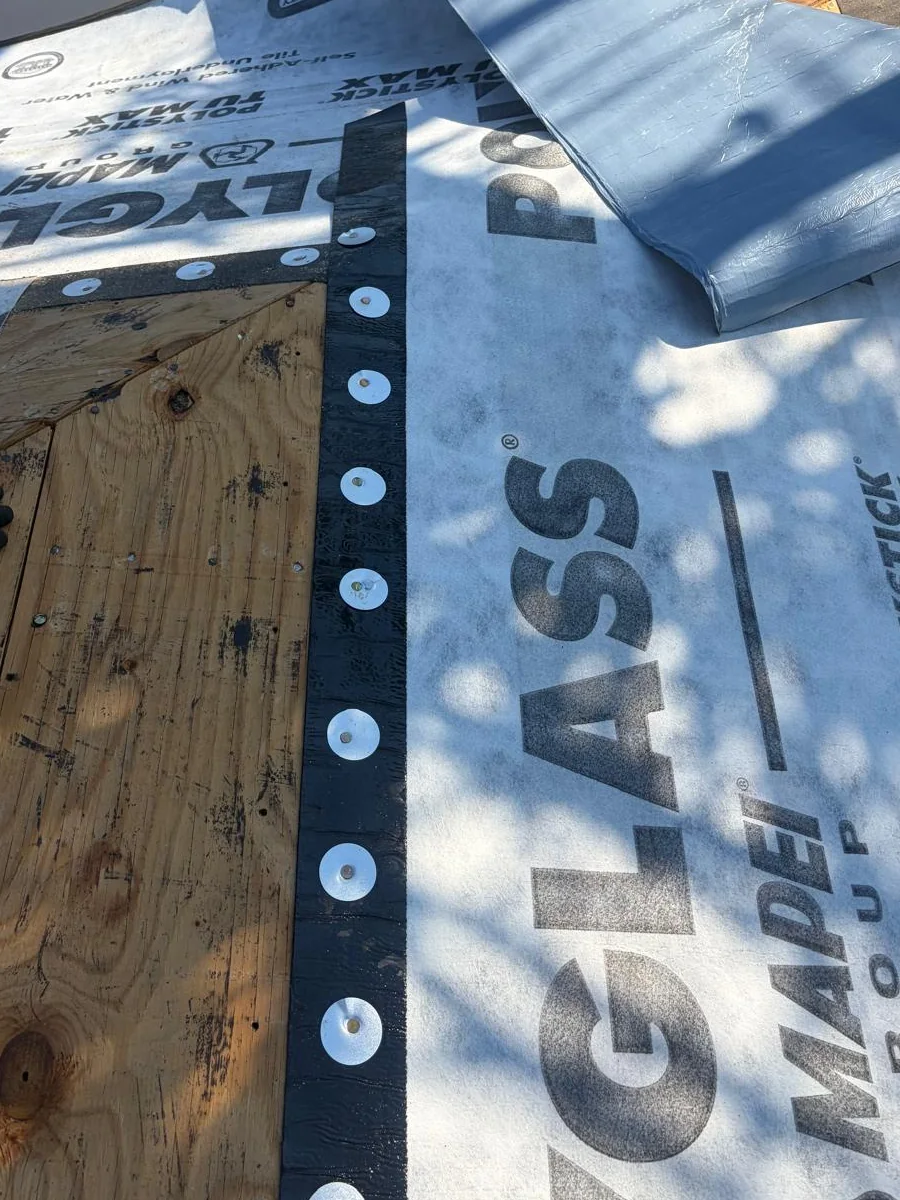
Polyglass Polystick TU MAX was installed direct to the prepared plywood deck and worked through the roof field, perimeter, and penetration areas shown in the photographs.
- 08
Dry-In Inspection Pending
The documented milestone ends with the underlayment in place and the project awaiting its dry-in inspection. Tile loading, tile attachment, the finished roof, and the inspection result are not represented here.
Authentic Project Gallery
The Miramar Dry-In Process in Photographs
Every image below is an authentic photograph from this reroof. The selected sequence documents repair and dry-in work without presenting a future tile installation as complete.
Wood Repairs Before Underlayment
Plywood and Fascia Repaired While Exposed
Tear-off exposed localized deteriorated roof decking and rotted fascia at the edge. The damaged sections shown were removed, and replacement wood was fitted before the direct-to-deck membrane covered the work.
The photo record supports the presence of those repairs, but it does not support a total plywood sheet count, fascia quantity, concealed-condition claim, or structural-engineering opinion.
Direct-to-Deck Dry-In
Prepared Edge Metal and Polystick TU MAX
After the documented wood and fastening work, metal drip edge was installed and its surface was prepared with primer. The underlayment was then self-adhered directly to the prepared plywood deck and completed through the photographed field, edge, and penetration areas.
Polyglass identifies Polystick TU MAX as a self-adhered wind-and-water tile underlayment. Product identification does not replace the permitted assembly, project-specific details, or the required inspection.
What the Photos Document
- • Localized deteriorated roof-deck removal and repair
- • Rotted fascia removal and replacement at the roof edge
- • Roof-deck re-fastening during dry-in preparation
- • Metal drip-edge installation and surface preparation
- • Polystick TU MAX applied directly to the prepared deck
- • An in-progress roof awaiting the dry-in inspection
Official References
Product, Inspection, and Community Sources
These references support the product name and local context. No manufacturer-reference photograph is presented as a project photograph on this page.
Miramar, Florida
Tile Reroof Dry-In FAQs
What does dry-in mean during a tile reroof?
For this project, dry-in is the stage after tear-off, documented wood repairs, deck preparation, edge work, and installation of the underlayment, but before the new tile roof covering. It is an intermediate construction milestone, not the finished roof.
Did this Miramar roof pass its dry-in inspection?
No inspection result is claimed. The photographs document the roof while the project was being prepared for its dry-in inspection, and the page status remains inspection pending.
Is Polystick TU MAX the finished roof covering?
No. Polyglass identifies Polystick TU MAX as a self-adhered wind-and-water tile underlayment. The new tile covering had not been installed at the stage documented in this case study.
Why was plywood replaced during this reroof?
The tear-off exposed localized deteriorated roof-deck areas. Those sections were removed and replaced before the direct-to-deck underlayment was completed. This page does not state a total repair quantity that was not supplied.
Why was rotted fascia replaced before dry-in?
The project photographs document deteriorated fascia at the roof edge. The damaged material was removed and replacement wood was installed before the perimeter work and dry-in were completed.
Does mentioning Somerset Country Club mean the HOA approved the roof?
No. Somerset Country Club, a community within Vizcaya, is included only as public neighborhood context. This case study does not claim HOA approval, endorsement, inspection, or responsibility for the roofing work.
Is every direct-to-deck tile underlayment automatically approved?
No. Product documents, the permitted roof assembly, project conditions, and the applicable review all matter. This page identifies the product and installation stage shown; it does not make a blanket approval or code-compliance claim.
Where is this in-progress Miramar tile reroof?
The public project location is Southwest 132nd Way, Miramar, FL 33027, within Somerset Country Club, a community within Vizcaya. The house number, homeowner information, and exact property address remain private.